

How to Run Ghost in App Engine Flex(ible)
- Written by John
- Nov 14th, 2019
I’ve changed my mind so many times when writing this article. Initially, I was writing about running Ghost on App Engine Flex, and then I started to write about running Ghost on App Engine Standard. Since I’ve had autoscaling problems with App Engine Standard, I’ve decided to write about running Ghost in App Engine Flex primarily. I will include the App Engine configuration to run it in Standard, at the end of the article, if you so wish.
I’m not going to cover why you should use App Engine, only that I believe you should consider it when choosing your platform. Let’s get started.
What we will be doing
- creating a development environment of Ghost, to run on our local machine
- deploying a productionised Ghost installation into App Engine
Notes
- we will be using Ghost version 3.0
- I will be using Windows 7/10 - if you’re using another OS, most items will apply, but you may have to change a few commands
- Ghost can use SQLite, a database as a file instead of an SQL database which will allow you to be up and running quickly. However, I would recommend using an SQL server to enable you to diagnose production issues, if required
- this guide will focus on running Ghost from a clean installation
Prerequisites
For the development environment, the following items require to be installed and configured.
- an LTS (Long Term Support) version of NodeJS - at the time of writing, version 12.13.0 is LTS
- an SQL server - I would recommend to use a stack like Xampp
- I would recommend using Visual Studio Code as an IDE to create and modify files
For the production environment in GCP, the following items are required to be installed or configured, ready to deploy into App Engine.
- a GCP project that has App Engine enabled
- a CloudSQL VM and database
- a Storage bucket with public read-only permissions
- GCloud SDK is installed on your local machine
- you have downloaded CloudSQLProxy
The local development environment
Before you start to install Ghost, make sure you’ve set up a development database on your SQL server, on your local machine.
Download Ghost and its dependencies
We will need to download Ghost via npm including all of its dependencies. We will not be using ghost-cli to install the development environment, mainly due to having issues when running or upgrading Ghost, from my experience. I have noticed using npm is a consistent way of installing and upgrading Ghost. However, ghost-cli is an easier way of completing these activities.
Create a new directory on your local machine called ghost within Documents (My Documents). In the root of the ghost folder, we need to create a package.json file that tells npm what the Ghost package is. Copy and paste the following into the package.json file.
{
  "dependencies": {
    "ghost": "latest"
  }
}
If you require to install an earlier version, replace the “latest” version with a different version number. You can view Ghost’s releases on Github to obtain the version number.
{
  "dependencies": {
    "ghost": "2.37.0"
  }
}
Open a Powershell window, navigate to Documents\ghost and run the following command.
npm install --production; cp node_modules/ghost/core/server/config/env/config.production.json node_modules/ghost/config.production.json; cp node_modules/ghost/core/server/config/env/config.development.json node_modules/ghost/config.development.json; npm audit fixFor Linux users, run the following command.
npm install --production && cp node_modules/ghost/core/server/config/env/config.production.json node_modules/ghost/config.production.json && cp node_modules/ghost/core/server/config/env/config.development.json node_modules/ghost/config.development.json && npm audit fixAfter a minute or two, the installation will complete and will place all packages in the node_modules directory. Here, you will have a folder called ghost; this is where your Ghost installation is.
When you are creating or modifying files, use Visual Studio Code as it will make things easier for you. Open the Documents\ghost\node_modules\ghost directory in Visual Studio Code.
Configuring your development environment
There are a few items left to complete the development installation.
- connect Ghost to the development database
- install the npm packages to run Ghost locally
- complete the Ghost web installation
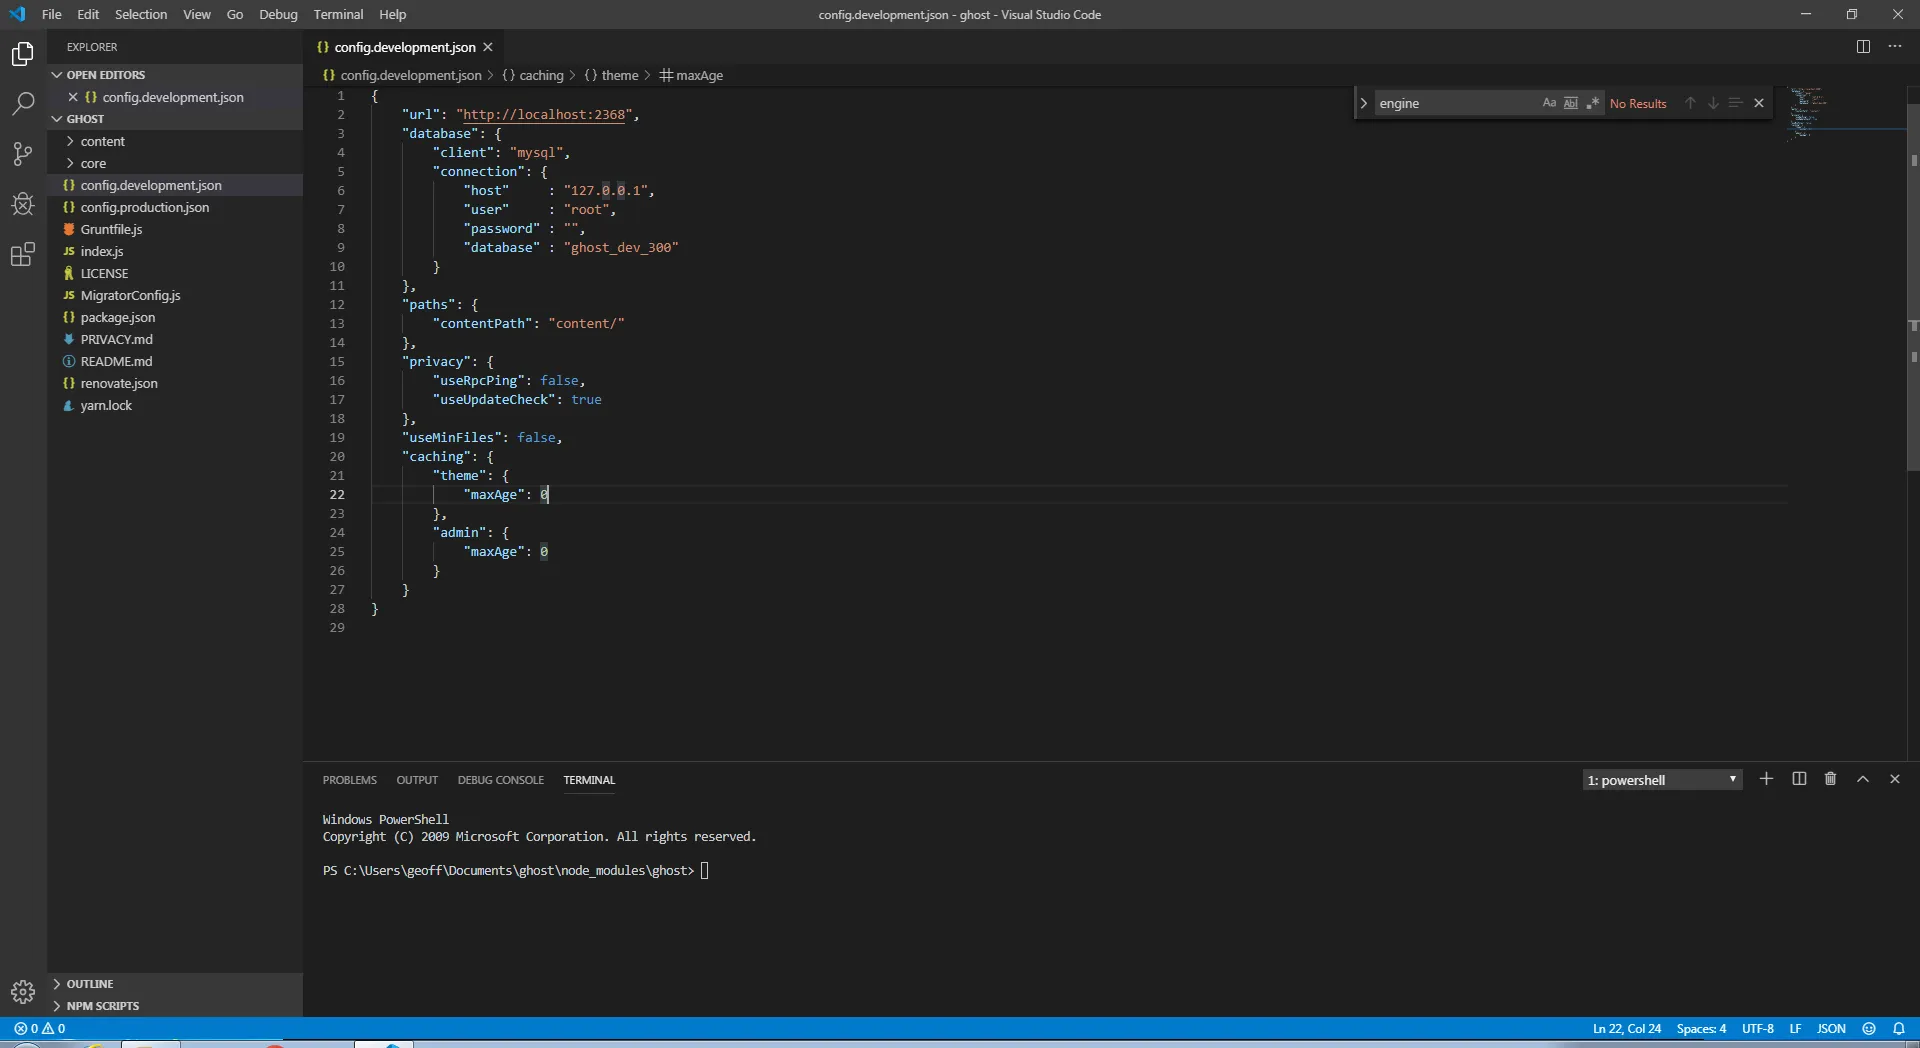
Open the config.development.json file; it should look like the following.
{
  "url": "https://2368-cs-26869278239-default.europe-west1.cloudshell.dev",
  "database": {
    "client": "sqlite3",
    "connection": {
      "filename": "content/data/ghost-dev.db"
    },
    "debug": false
  },
  "paths": {
    "contentPath": "content/"
  },
  "privacy": {
    "useRpcPing": false,
    "useUpdateCheck": true
  },
  "useMinFiles": false,
  "caching": {
    "theme": {
      "maxAge": 0
    },
    "admin": {
      "maxAge": 0
    }
  }
}
Replace the database section with the following variables.
{
  "database": {
    "client": "mysql",
    "connection": {
      "host": "127.0.0.1",
      "user": "root",
      "password": "",
      "database": "ghost_dev_300"
    }
  }
}
Your config.development.json file should look like this.
{
  "url": "https://2368-cs-26869278239-default.europe-west1.cloudshell.dev",
  "database": {
    "client": "mysql",
    "connection": {
      "host": "127.0.0.1",
      "user": "root",
      "password": "",
      "database": "ghost_dev_300"
    }
  },
  "paths": {
    "contentPath": "content/"
  },
  "privacy": {
    "useRpcPing": false,
    "useUpdateCheck": true
  },
  "useMinFiles": false,
  "caching": {
    "theme": {
      "maxAge": 0
    },
    "admin": {
      "maxAge": 0
    }
  }
}
Change your user, password and database variables to what you’ve configured on the SQL server.
You need to install the packages via npm to allow you to start Ghost. To do this, open a Terminal (at the top) as Powershell, in Visual Studio Code. Your environment should look like this.
Run the following command to install the packages and to start Ghost.
npm install; npm audit fix; npm startFor Linux users run the following command.
npm install && npm audit fix && npm start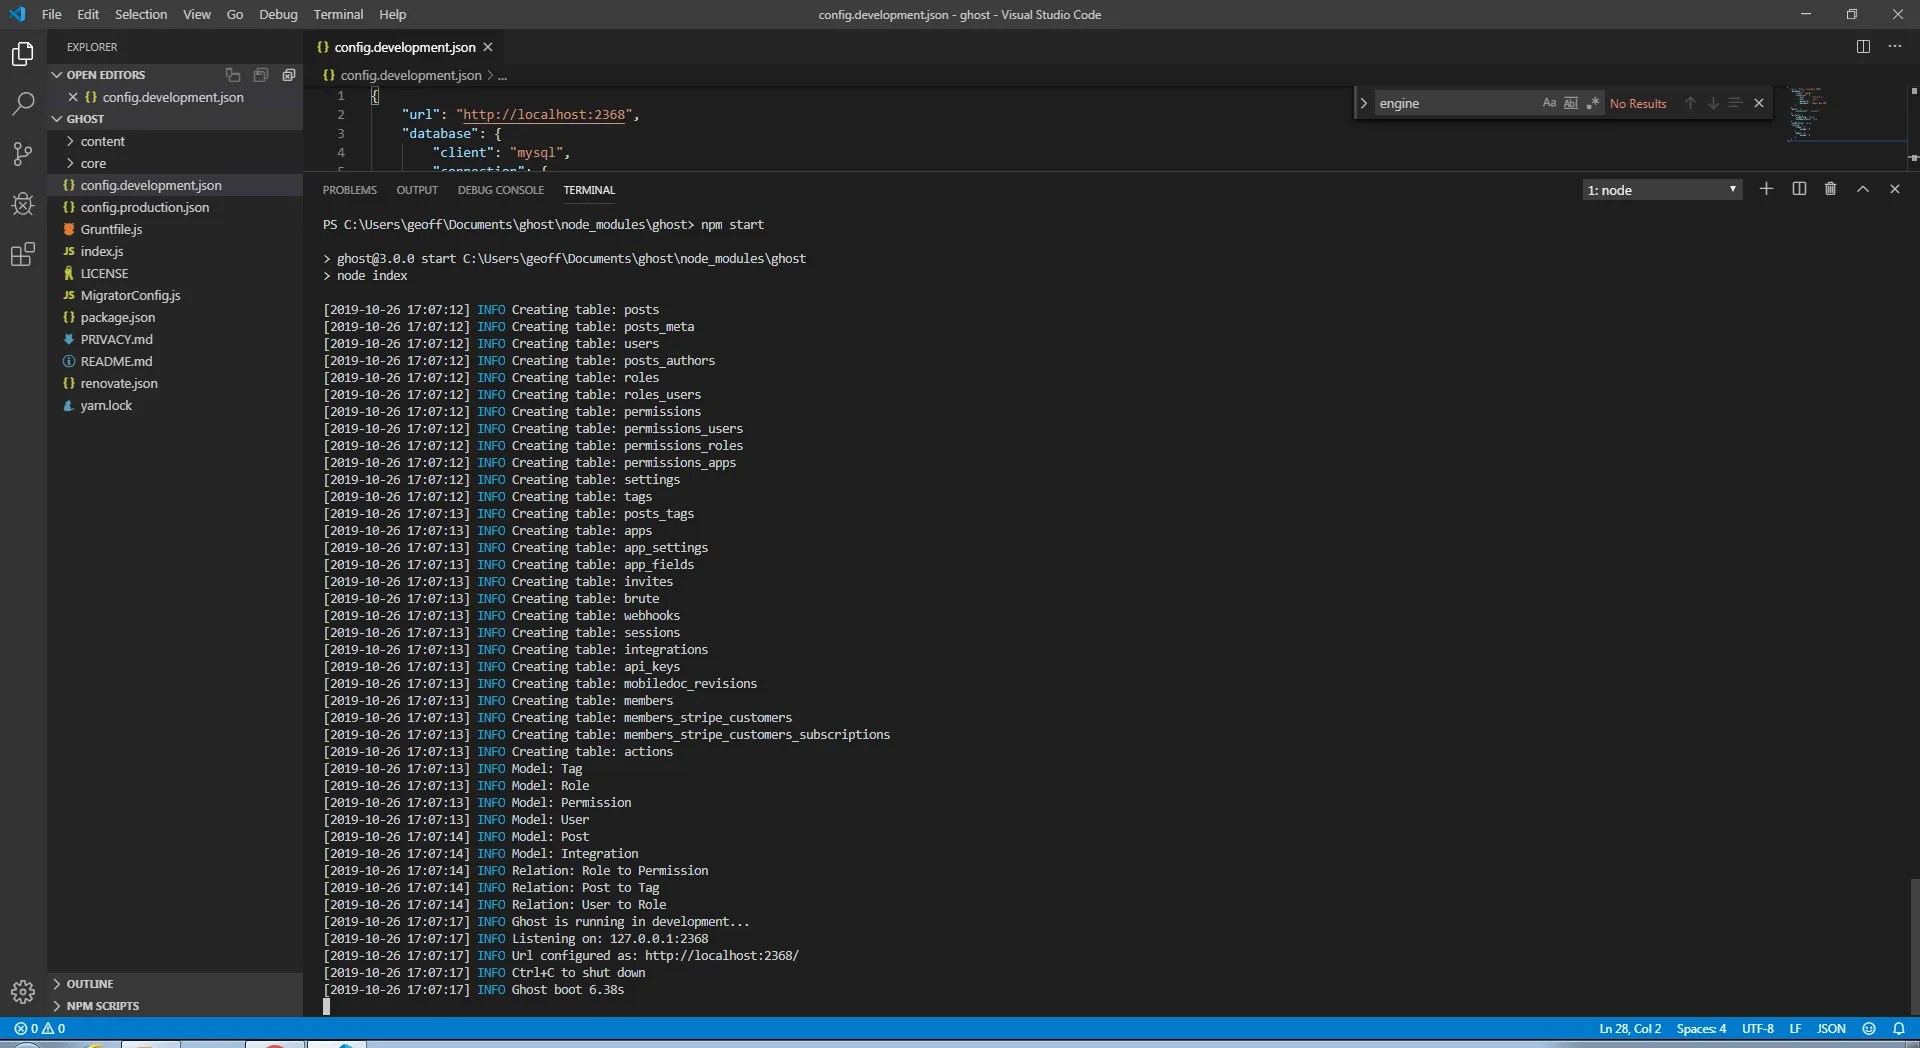
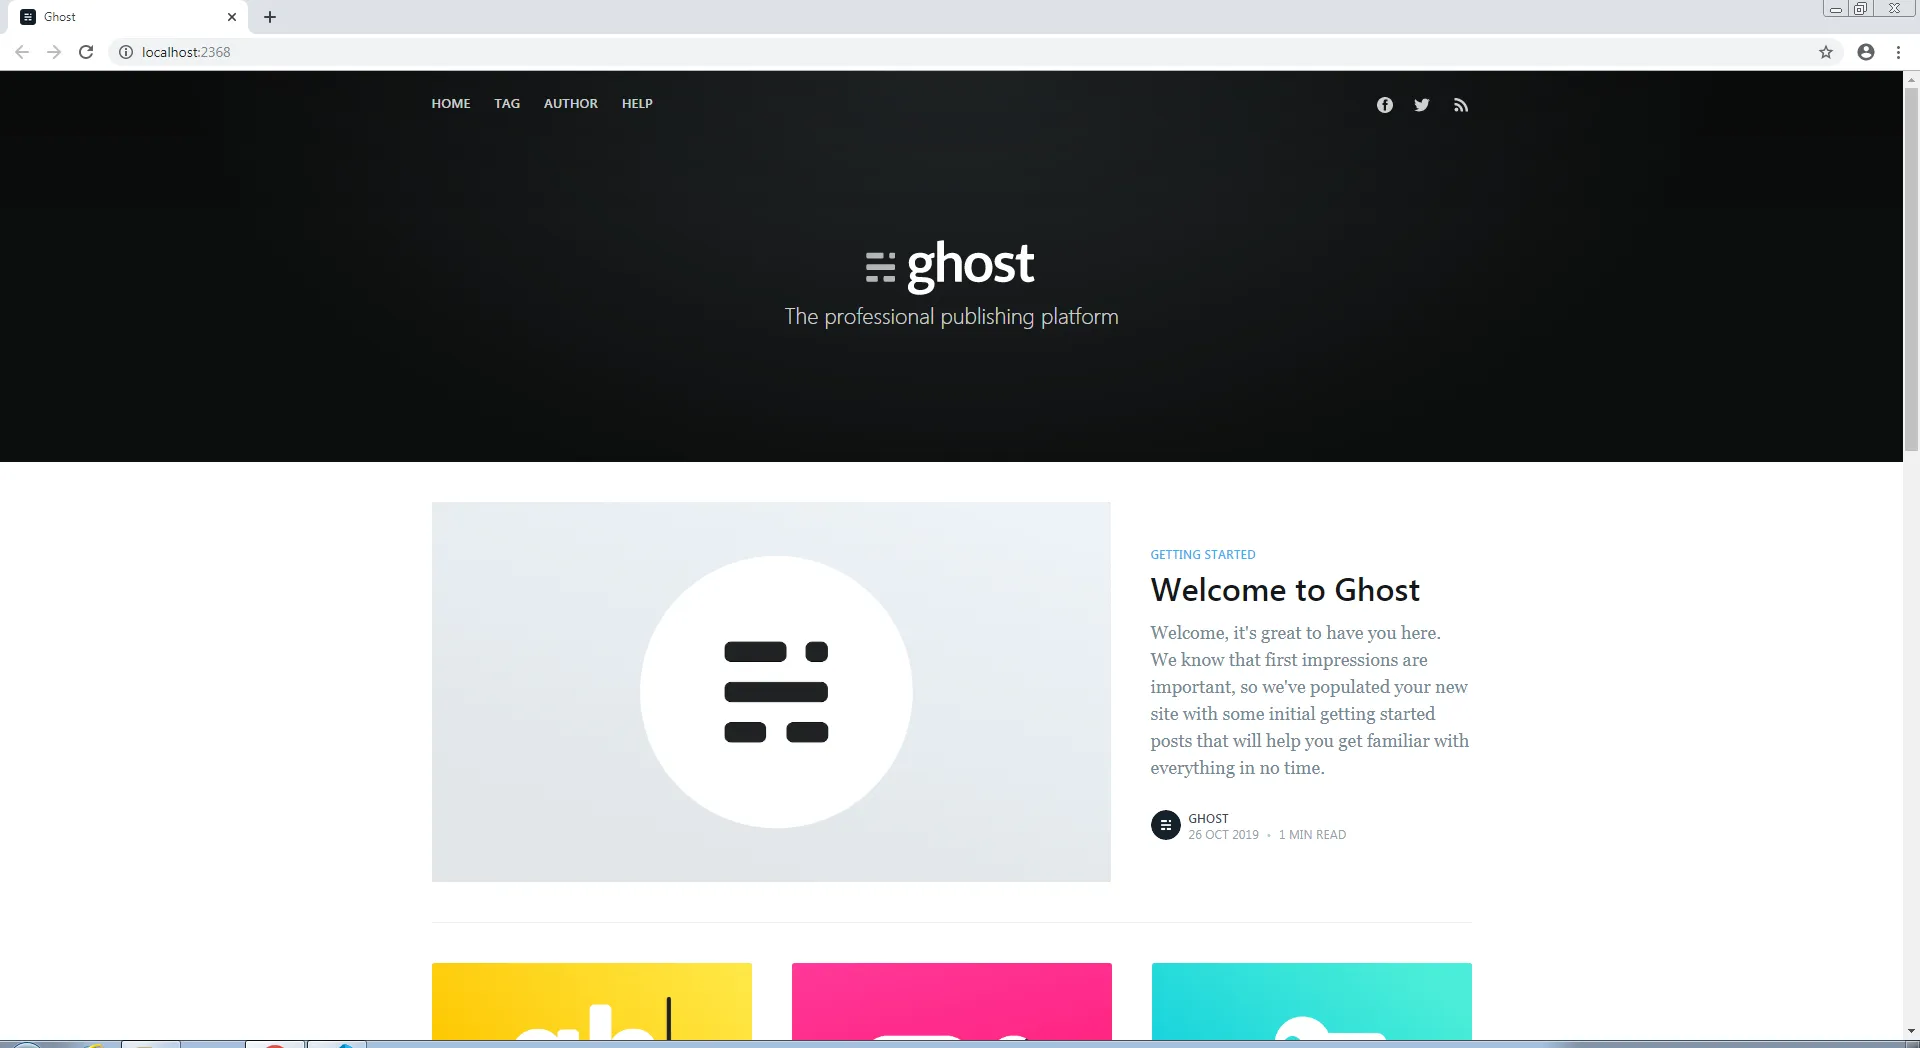
As Ghost starts, it will create the required tables in the database. Once the tables have created, Ghost will be running. Open your browser and navigate to https://2368-cs-26869278239-default.europe-west1.cloudshell.dev. You should be viewing the getting started posts that Ghost has created.
Complete the Ghost installation
The last thing to do is to set up an admin account and give the website a name. Go to https://2368-cs-26869278239-default.europe-west1.cloudshell.dev/ghost to start the installation, following the setup process. Once completed, Ghost will look like this.
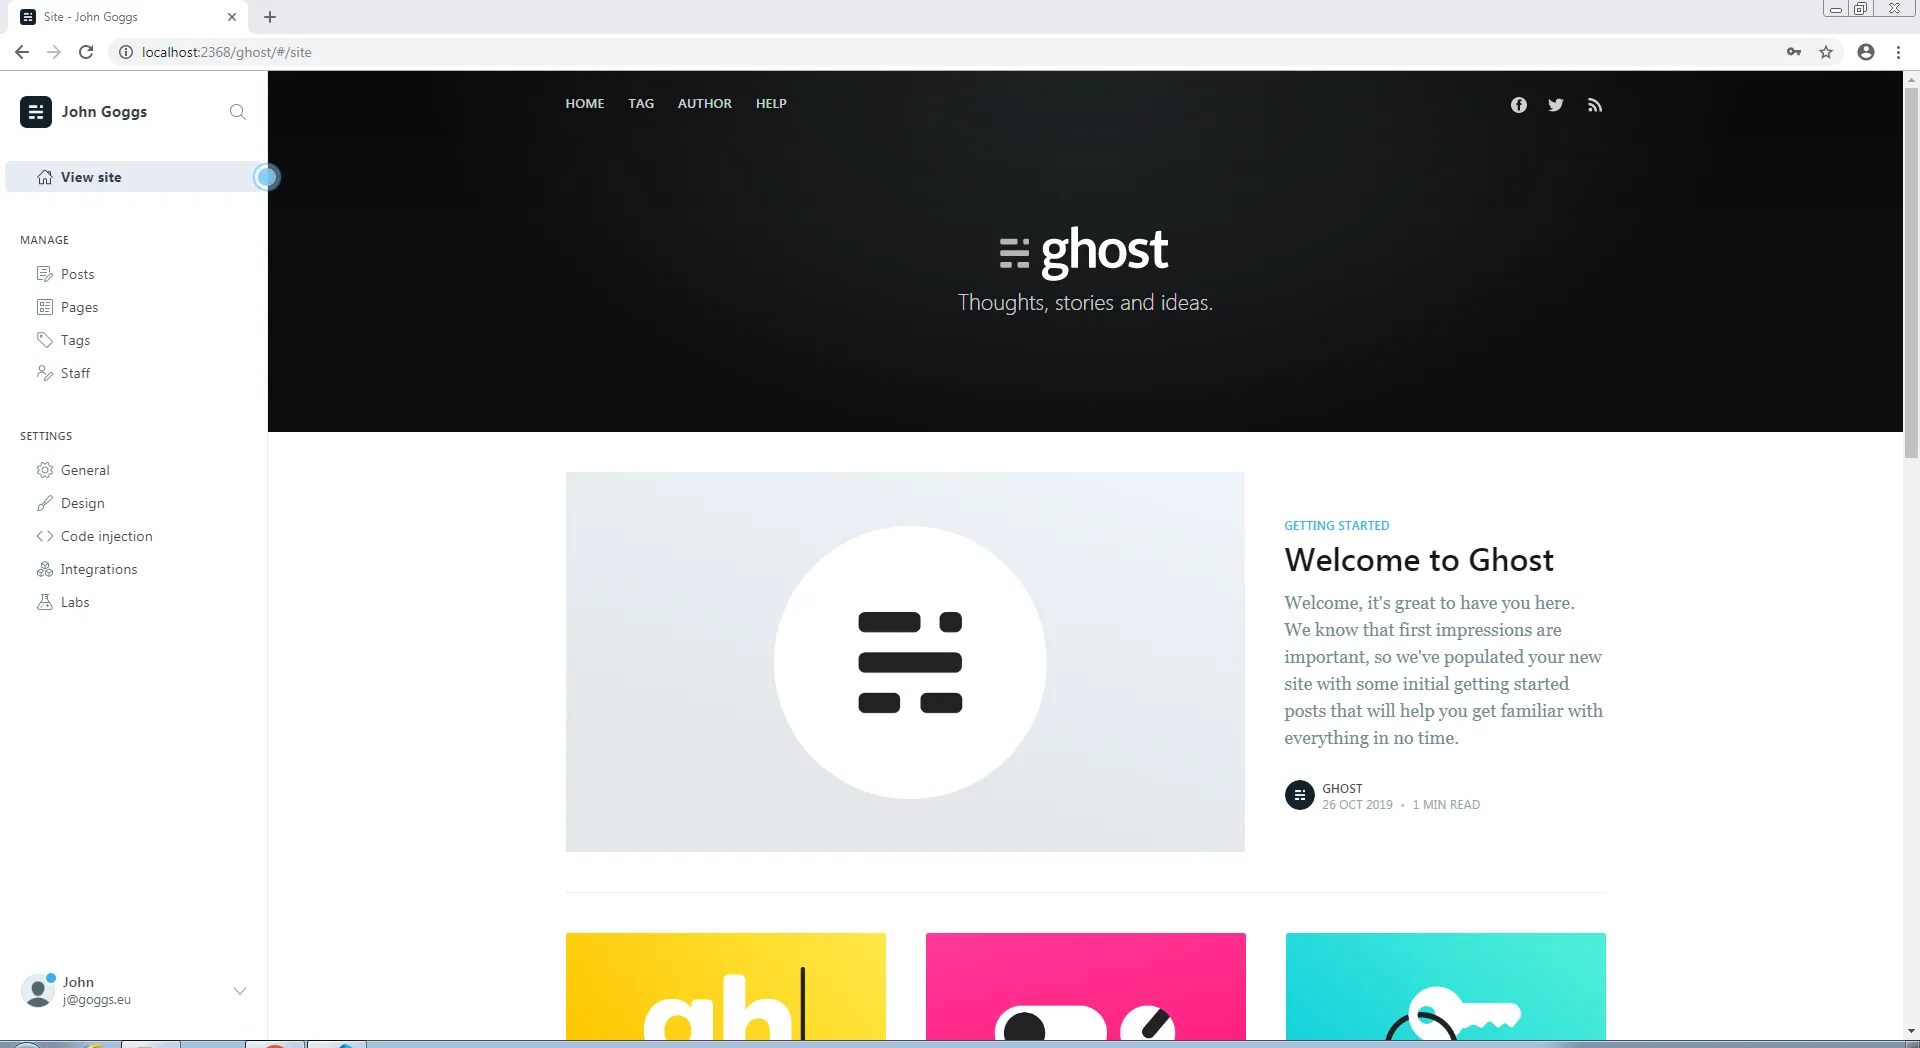
I will encourage you to play around with Ghost as it differs from other platforms. The main area for you to focus on is writing. Ghost uses Markdown, and if you’re not familiar with Markdown, you will need to understand it.
Productionising your development environment
Ghost makes it very easy to productionise your development installation. You only need to configure your config.production.json file. Let’s get started.
Open the config.production.json file. You will notice it differs from the development file quite a bit, already having a SQL database section and a logging section. Your config file should look similar to this.
{
  "database": {
    "client": "mysql",
    "connection": {
      "host": "127.0.0.1",
      "user": "root",
      "password": "",
      "database": "ghost"
    }
  },
  "paths": {
    "contentPath": "content/"
  },
  "logging": {
    "level": "info",
    "rotation": {
      "enabled": true
    },
    "transports": ["file", "stdout"]
  }
}
The first thing to do is to remove the ability for Ghost to use local storage and to set the correct URL. Ensure you change the URL that reflects against your GCP project. Place this above the database section.
{
  "url": "https://<project_name>.appspot.com",
  "fileStorage": false
}
Next, you need to configure the database section, ensuring you’re pointing App Engine to your CloudSQL instance and database. The only variables that have changed are the host and a new variable, charset.
{
  "database": {
    "client": "mysql",
    "connection": {
      "socketPath": "/cloudsql/<CloudSQLInstanceName>",
      "user": "database_username",
      "password": "database_password",
      "database": "database_name",
      "charset": "utf8mb4"
    },
    "debug": false
  }
}
Next, add a new section to configure which host and port Ghost will run on when deployed on to App Engine. Add this below the database section.
{
  "server": {
    "host": "0.0.0.0",
    "port": "8080"
  }
}
Finally, writing logs to the operating system, as files, should be disabled. On App Engine Flex, you can output logs to files on the operating system as you can read-write with Flex. I don’t see any advantage to this as you cannot access the files on the host. Disabling logs as files also ensures if you want to move to App Engine Standard, you will be able to deploy and run the application. App Engine Standard runs in a read-only mode, not allowing the application to write anything to the operating system.
Change the logging section to the following.
{
  "logging": {
    "level": "info",
    "rotation": {
      "enabled": true
    },
    "transports": ["stdout"]
  }
}
Installing and configuring Cloud Storage adapter
As you cannot access files to the operating system, you need a different way to read and write media files. The Cloud Storage adapter does this for you. Instead of storing your media files on your operating system, Cloud Storage will house them.
You don’t have to use Cloud Storage to store your media files; you can use Amazon S3 or Google Drive. For a full list of storage adapters, go here.
Let’s go ahead and save the Google Cloud Storage adapter in the package.json file.
For Ghost v2.x.x
npm install --save ghost-google-cloud-storage-newFor Ghost v3.x.x
npm install --save ghost-v3-google-cloud-storageIf you look in the package.json file, you should see the package name under the dependencies section.
What you’ve done so far will only include the Cloud Storage adapter as a package. Functionally, nothing will be different when uploading media files to your posts. You need to add the new storage adapter in Ghost.
Create a new directory structure storage\gcloud under core\server\adapters and create a new file in the gcloud directory called index.js. You should end up with a directory structure of core\server\adapters\storage\gcloud\index.js.
In the index.js file, add the following text.
ghost-google-cloud-storage-new
"use strict";
module.exports = require("ghost-google-cloud-storage-new");
ghost-v3-google-cloud-storage
"use strict";

const path = require("path");
const BaseAdapter = require("ghost-storage-base");
const { Storage } = require("@google-cloud/storage");

class GoogleCloudStorageAdapter extends BaseAdapter {
  constructor(config = {}) {
    super(config);

    let storage;

    if (config.keyFilename) {
      storage = new Storage({
        keyFilename: config.keyFilename,
      });
    } else {
      storage = new Storage();
    }

    this.bucket = storage.bucket(config.bucket);
    this.assetDomain = `${config.bucket}.storage.googleapis.com`;
    if (config.cdn) {
      this.assetDomain = config.cdn;
    }
  }

  exists(fileName, targetDir) {
    return this.bucket
      .file(path.join(targetDir, fileName))
      .exists()
      .then(function (data) {
        return data[0];
      })
      .catch((error) => Promise.reject(error));
  }

  save(image) {
    const targetDir = this.getTargetDir();
    let targetFilename;
    return this.getUniqueFileName(image, targetDir)
      .then((fileName) => {
        targetFilename = fileName;

        const options = {
          destination: fileName,
          metadata: {
            cacheControl: `public, max-age=${3600 * 24 * 365}`,
          },
          public: true,
        };
        return this.bucket.upload(image.path, options);
      })
      .then((data) => {
        return `https://${this.assetDomain}/${targetFilename}`;
      })
      .catch((error) => Promise.reject(error));
  }

  serve() {
    // File paths are absolute URLs, no need to serve
    return function customServe(req, res, next) {
      next();
    };
  }

  delete(fileName) {
    return this.bucket.file(fileName).delete();
  }

  read(options = {}) {
    const readStream = this.bucket.file(options.path).createReadStream();
    let contents = null;
    return new Promise(function (resolve, reject) {
      readStream.on("error", function (err) {
        return reject(err);
      });
      readStream.on("data", function (data) {
        if (contents) {
          contents = data;
        } else {
          contents = Buffer.concat([contents, data]);
        }
      });
      readStream.on("end", function () {
        return resolve(content);
      });
    });
  }
}

module.exports = GoogleCloudStorageAdapter;
You need to configure the Cloud Storage adapter to ensure it can read and write to the correct storage bucket. Add the following config to the bottom of your config.production.json file. If you’re using the default Cloud Storage URL, remove the assetDomain variable. You only need to configure assetDomain if you have a CDN or a load balancer to your storage bucket.
ghost-google-cloud-storage-new
{
  "storage": {
    "active": "gcloud",
    "gcloud": {
      "projectId": "Your_project_id",
      "key": "Your_key_path.json",
      "bucket": "Your_bucket_name",
      "assetDomain": "domain-for-bucket.example.com",
      "insecure": false,
      "maxAge": "2678400"
    }
  }
}
ghost-v3-google-cloud-storage
{
  "storage": {
    "active": "gcs",
    "gcs": {
      "bucket": "your-gcs-bucket-name",
      "keyFilename": "path-to-your-service-account.json",
      "cdn": "optional-cdn-domain"
    }
  }
}
Finally, you’ll need to create a service account to allow Ghost to read and write to your Cloud Storage bucket.
Once you have created the service account, create a key and add it to your Ghost installation. Change the key variable in config.production.json to the location of your service account key; this needs to include the file path and file name.
You’ll need to grant this service account read and write permissions to your Cloud Storage bucket.
Creating your app.yaml config
To be able to deploy Ghost to App Engine, you need to include an app.yaml config file. Copy and paste the following into a new file called app.yaml. This file needs to be in the root directory of your Ghost installation.
service: default
runtime: nodejs
env: flex
resources:
  cpu: 0.1
  memory_gb: 1
  disk_size_gb: 10

automatic_scaling:
  min_num_instances: 1
  max_num_instances: 2
  cpu_utilization:
    target_utilization: 0.1

env_variables:
  MYSQL_USER: database_username
  MYSQL_PASSWORD: "database_password" # Quotes are used to ensure symbols are not interpreted incorrectly
  MYSQL_DATABASE: database_name
  INSTANCE_CONNECTION_NAME: CloudSQLInstanceName

beta_settings:
  cloud_sql_instances: CloudSQLInstanceName
skip_files:
  - ^(.*/)?#.*#$
  - ^(.*/)?.*~$
  - ^(.*/)?.*\.py[co]$
  - ^(.*/)?.*/RCS/.*$
  - ^(.*/)?node_modules/$
  - ^(.*/)?.*\.ts$
  - ^(.*/)?config\.development\.json$
Initialising the database
Just like what we did for the development installation, you need to initialise the database to ensure all tables, in the database, are created. You can achieve this a couple of ways. You can import your development database, or you can connect to your CloudSQL instance directly, from your local machine. We’re going to use the CloudSQLProxy, from Google, to connect to the database directly and create the required tables from a local installation.
Open a Powershell window and navigate to the location where you’ve downloaded the CloudSQLProxy file. Run the following command to initialise the connection. Make sure you input your CloudSQL instance connection name.
cloud_sql_proxy -instances=<INSTANCE_CONNECTION_NAME>=tcp:3306
Once you’re connected, temporarily replace the socketPath variable with the host variable. Set host to 127.0.0.1 and run the following command.
npm start --productionNote: CloudSQLProxy does not allow access to the database by default. You will have to add the user database_user@cloudsqlproxy~ip to the database.
Deploying Ghost
Before you deploy Ghost on to App Engine, please check the config.production.json file is correct. Below is an example of the final file.
{
  "url": "https://<project_name>.appspot.com",
  "fileStorage": false,
  "database": {
    "client": "mysql",
    "connection": {
      "socketPath": "/cloudsql/<CloudSQLInstanceName>",
      "user": "database_username",
      "password": "database_password",
      "database": "database_name",
      "charset": "utf8mb4"
    },
    "debug": false
  },
  "server": {
    "host": "0.0.0.0",
    "port": "8080"
  },
  "paths": {
    "contentPath": "content/"
  },
  "logging": {
    "level": "info",
    "rotation": {
      "enabled": true
    },
    "transports": ["stdout"]
  },
  "storage": {
    "active": "gcloud",
    "gcloud": {
      "projectId": "Your_project_id",
      "key": "Your_key_path.json",
      "bucket": "Your_bucket_name",
      "insecure": false,
      "maxAge": "2678400"
    }
  }
}
If everything checks out, go ahead and deploy Ghost.
gcloud app deploy app.yamlIf you’re deploying on to App Engine for the first time, expect to wait a few minutes for the deployment to complete.
Don’t forget to navigate to https://<project_id>.appspot.com/ghost to complete the setup process of Ghost.
App Engine Standard config
As promised, below is the app.yaml config to allow you to run Ghost in App Engine Standard.
runtime: nodejs12
env: standard
instance_class: F1

automatic_scaling:
  max_instances: 2

env_variables:
  MYSQL_USER: database_username
  MYSQL_PASSWORD: "database_password" # Quotes are used to ensure symbols are not interpreted incorrectly
  MYSQL_DATABASE: database_name
  INSTANCE_CONNECTION_NAME: CloudSQLInstanceName
I would not recommend using automatic scaling; this is because Google will spin down the instances to zero, causing your application to stop. When the instance receives the next request, it will start to boot the instance.
For a full list of instance types, go here.
Resources
This section lists all external references that have contributed to this article.
- NodeJS
- Xampp - a php based web development application stack
- Visual Studio Code
- Google Cloud SDK
- Ghost’s releases on Github
- Markdown for Ghost
- Ghost’s Storage adapters
- For Ghost v2.x.x - Kay Schneider’s Cloud Storage adapter - this is the storage adapter on Github, based on the original Cloud Storage adapter by Thom Buchi
- For Ghost v3.x.x - Mike Nikles’s Cloud Storage adapter
- App Engine Standard instance types